Sunday, May 29, 2011

Coffee House Cookies


These cookies really are as easy as 1-2-3-4-5!  5 ingredients come together to create these chocolatey, chewy treats - perfect with an evening cup of warm goodness and few friends.


1 white cake mix (Duncan Hines is the best in my opinion.)
1/2 cup oil
2 eggs
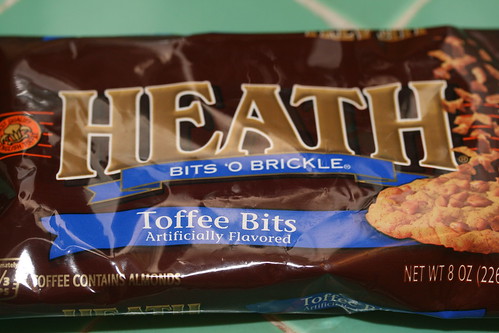
1 cup Skor bar pieces (or Heath bar bits, if you live in the States)
1 cup semi-sweet chocolate chips

Combine the first three ingredients in an electric mixer (or with your hand-held mixer) until fully incorporated.  Add Skor pieces and chocolate chips.  Run the mixer a couple more seconds to really mix them in.

Scoop two tablespoons of dough and form into a ball.  Arrange on baking stone or sheet. (I use my Pampered Chef pizza stone for this - it's the perfect versatile stone.)

Bake at 375 degrees for 10 minutes.  The cookies will appear slightly underdone, but as they cool they'll firm up.

Cool on a baking rack ... but you must sneak a couple straight out of the oven. ;)

Friday, May 27, 2011

Concord Crush Birthday


I love well-put-together shabby cards that boast a variety of patterns and unassuming colours.  I'm lovin' the ruffles - next time I make this card, I think I'll put even more!  I distressed the flower and the punched ruffles by smudging ink around the edges with my ink pad, carefully crumbling them up in my fingers, then slowly unwrapping and smoothing them out.  For some reason it makes the paper really flexible.  I stuck them together with adhesive, cut them to size on either side, then took them over to my sewing machine to add some stitching.


Materials (all are Stampin Up! unless otherwise noted):

Curly Cute Stamp Set*
Blossom Bouquet Triple Layer Punch
Scallop Punch
Random scraps of patterned paper
Concord Crush Smooth Cardstock
Soft Suede Smooth Cardstock
White Cardstock
Button is from Button Latte Pack
Soft Suede Polka Dot Grosgrain Ribbon
Scotch Dimensional Tape
Skinny hemp twine (purchased by the spool at Walmart)
Zip Dry paper glue

*I didn't have room on the card to use the "Happy Birthday" stamp normally, so I inked one side ... stamped, then inked the other side and stamped below.  The clear sets are great for that kind of creative freedom.

Tuesday, May 24, 2011

You're Invited!


Morgan's 9th birthday is just around the corner.  So ... tonight we began the task of planning the bash by making the invitations.  Morgan chose a bright, fun and very "teenagery" look (in her opinion).  I'm hoping this will be a party she never forgets ... a pool party sleepover with all her closest friends.  I savour these moments as a mom - they are priceless ...


Materials (all are Stampin' Up! unless otherwise stated):
  • Inviting Stamp Set
  • Flight of the Butterfly Stamp Set
  • Pacific Point, Melon Mambo and True Thyme Ink Pads
  • Ice Cream Parlor Designer Series Paper
  • Pacific Point Smooth Cardstock
  • White Cardstock (purchased in bulk at my local office supply store)
  • Hot pink ribbon (purchased in the $1 section at Michaels)
  • Jelly Roll Sparkle Pen - Clear Star
  • Sewing machine with white thread (set to 1.3 zig-zag stitch)
  • Scotch dimensional tape
  • Zip Dry glue
  • Snail Adhesive
I love that she wanted to make the invites.  I don't think there is a simpler card to make ... they come together so fast!


Wednesday, May 18, 2011

A Happy Space


One of my latest crafty ventures happens to be the very room I craft in.  This room has lacked purpose for a long time ... it's the smallest of our bedrooms, but it's upstairs next to the master, so it always seems to be in a state of transition (nice phrase for office clutter catch-call).  But finally, a purpose!


I've taken on quite a bit of freelance design work on top of my full-time work, so I needed a real office space for myself ... a place where I can close the door and concentrate.  So, along with the necessary office basics, why not fill it with everything creative and inspirational?!  Including the chalk board wall where I can remind myself to keep going and growing, my sewing machine, my stamping creation station, and, last but not least, a TV for ME.  I love it ...


Matt built me an amazing table to fit the space (you should have seen us trying to get it into the room!)
We found the plans at www.ana-white.com.


I've tried to be creative in my storage solutions as well.  I used a re-purposed loaf pan to conveniently display my most-used spools of ribbon and a glass cookie jar holds the rest.


A rolling crate makes the perfect 12x12 paper storage.  I can roll it anywhere and easily find any paper I'm looking for.  Baskets and shelving magically hide all the paint brushes, stickers, craft projects, etc.


But ... with all the things I love about this space, one thing tops them all - the fact that Morgan loves it too.  She's in here constantly.  It's a place where she can come and be free to create.  It's the gathering place for her and her friends too.  I hope that continues for years to come ...


Happy crafting!

Tuesday, May 17, 2011

Happy Birthday, Man!


How hard is it to make a card for a guy?  HARD.  I am in love with the Engraved Greetings stamp set for this very reason.  It's my go-to set for last minute cards - they seem to come together in about 5 minutes and create a simple, yet elegant result.


MATERIALS:
(all materials are from Stampin' Up! unless otherwise stated)
  • Engraved Greetings Stamp Set
  • Early Espresso Ink Pad
  • Early Espresso Smooth Card Stock
  • Dotted Scallop Ribbon Border Punch*
  • Thoroughly Modern Designer Series Paper
  • Bronze Pearls (from the dollar section at Michael's)
*Designer's Note:
I used the scraps from the Ribbon Punch to make the two little borders that line the sides of the stamp.  Anytime I use this punch with cardstock, I save those little edges.  They make perfect accent borders!!