Showing posts with label Meaty Meals. Show all posts
Thursday, July 25, 2013
Cream of Mushroom Soup
One of the most convenient cans in the kitchen is "cream of" soup. It adds so much flavour to so many dishes and casseroles. You don't really realize how much you use it until you can't ... because it has wheat (and MSG ... but we won't even go there - I could go on forever about the chemical carcinogen "cream of" cans they try to sell us as soup, but I'll save that conversation for another day :) ). Have you ever tasted the canned "cream of" condensed soups? Salty ... with the consistency of snot. Sorry ... that was gross, but ... true.
I did happen upon a gluten-free substitute that was pretty good made by Progresso, but it wasn't condensed and didn't give the same thick and creamy consistency. So ... out of a yearning for Mr. Dell's Potato Casserole (sub Kettle potato chips for the corn flakes) and the Pioneer Woman's Chicken Spaghetti made with rice pasta, I was determined to come up with an easy gluten-free recipe ... and my friends, I have it!
I can't believe how good this soup really is! We were fighting over who got to lick the spoon! It was PERFECT, not to mention, it stores really well in the fridge or freezer (bonus!) ... and came together in around 20 minutes (double bonus!).
It could be made with celery too (for cream of celery) ... same ingredients, just sub celery for mushrooms. You might have to add a little extra broth before you add the flour ... but it should be an easy substitute.
I'll be posting my cream of chicken in a few days. I hope that, again, you are encouraged by what you see. Just because you've been diagnosed with a food allergy/intolerance or have decided to eliminate gluten for better health, doesn't mean you have to be deprived of the things you love. You just have to think a little outside the box ... or the can. :)
1 recipe = 4 cans of condensed cream of mushroom soup
1/4 cup butter
around 6 cups chopped mushrooms - any kind
3/4 cup brown rice flour (you can use wheat flour if you don't have gluten issues)
2 cups warm water
2 cups half and half
1 organic vegetable bouillon cube (I use GoBio)
1 teaspoon sea salt
1 teaspoon fresh ground pepper
Roughly chop mushrooms.
On medium heat, melt butter in a large wok or dutch oven.
Add mushrooms and cook down until they start to release all their moisture - around 5 minutes. It's crazy how much they shrink!
Sprinkle flour all over the top and stir. It will get REALLY thick. Cook for a couple minutes, stirring constantly so the flour gets a little browned and doesn't taste raw.
Mix bouillon cube into the water and slowly stir into the mushroom "paste". Stir in cream.
Bring just to a boil, stirring regularly. Remove from heat.
Cool to room temperature and pack in jars to store in the fridge (if you're using in the next couple days) or package in ziploc freezer bags for the freezer. See how thick it gets!! Now give it a little taste ... wow! SO GOOD and SO MUCH better for you! :) YAY!
Saturday, June 1, 2013
All-Purpose Gluten-free Baking Mix
I've discovered the most wonderful gluten-free thing EVER - Bisquick! Well, not really the name brand ... but a homemade version that will totally knock your socks off!
My parents have been visiting from Kansas City for the last little while and my mom brought a couple packages of the gluten-free Bisquick for us to try. IT WAS SO GOOD!! We made pancakes and shortcakes and pie crust and pizza ... but my joy and excitement was short-lived when I learned the product was not available in Canada. WHAT??!!
I scoured Pintrest for an alternative and guess what?! I found one! AND IT'S EVEN BETTER than Bisquick. We tried it ... we tested it - pancake for pancake, shortcake for shortcake ... and the winner EVERY time was the homemade mix. It was so much fluffier the the Bisquick, surprisingly. I was able to find everything I needed at Bulk Barn here for a fraction of the cost of the name brand.
On top of it being extremely versatile and so stinkin' delicious, this mix has another thing going for it - no preservatives or modified, processed ingredients. That's HUGE! I can actually have a say in the quality of ingredients I make it with - love it! Every recipe I've tried, I've made with Trader Joe's Unsweetened Vanilla Almond Milk ... yes, my friends, that means many of the recipes can be made dairy-free and soy-free as well! I even converted my dad to the almond milk ... and for those of you who know him, pigs must be flying ...
INGREDIENTS
1 1/2 cups rice flour - brown or white (I prefer brown)
1 1/2 cups potato starch
3 tablespoons evaporated cane juice or sugar (I haven't tried xylitol, but maybe?)
1 tablespoons + 2 teaspoons gluten free baking powder
1 1/2 teaspoons xanthan gum
2 teaspoons fine sea salt
In a large bowl, whisk together all ingredients; sift the mixture four times.
Double, triple, quadruple the recipe so you can have it on-hand, store in an air-tight container and use as a substitute for any recipe calling for gluten-free Bisquick. My mom even uses it in place of flour, depending on the recipe ... like in her Crustless Coconut Custard Pie ... but that's a post for another day. :)
Need recipe ideas for the baking mix? Not a problem! Betty Crocker has a huge recipe portal that include a variety of options calling for gluten-free Bisquick. Check it out and become a member - it's free! There really are a million ways to use this mix. Here are a few of my favourites ...
Cornbread
Strawberry Shortcakes
Pancakes and Waffles (made with melted butter instead of oil)
Ultimate Chicken Fingers
Cheeseburger Pie
Easy Taco Pie
Chocolate Chip Scones
Snickerdoodles (made with all butter)
Cheesecake
Biscuits
2 cups gluten-free baking mix
1/3 cup butter (or Earth Balance)
2/3 cup milk (or almond milk)
3 eggs
Heat oven to 400 degrees.
Cut butter into flour using a pastry cutter or fork until ingredients look grainy ... like extra course corn meal. Mix in the remaining ingredients until a soft dough forms.
Drop by the spoonful onto a greased baking sheet. I honestly prefer a greased muffin tin, as the biscuits don't spread so much.
Bake 13-16 minutes, or until golden.
Makes 10 biscuits. If you want a dinner biscuit, add in some cheese and roasted garlic!
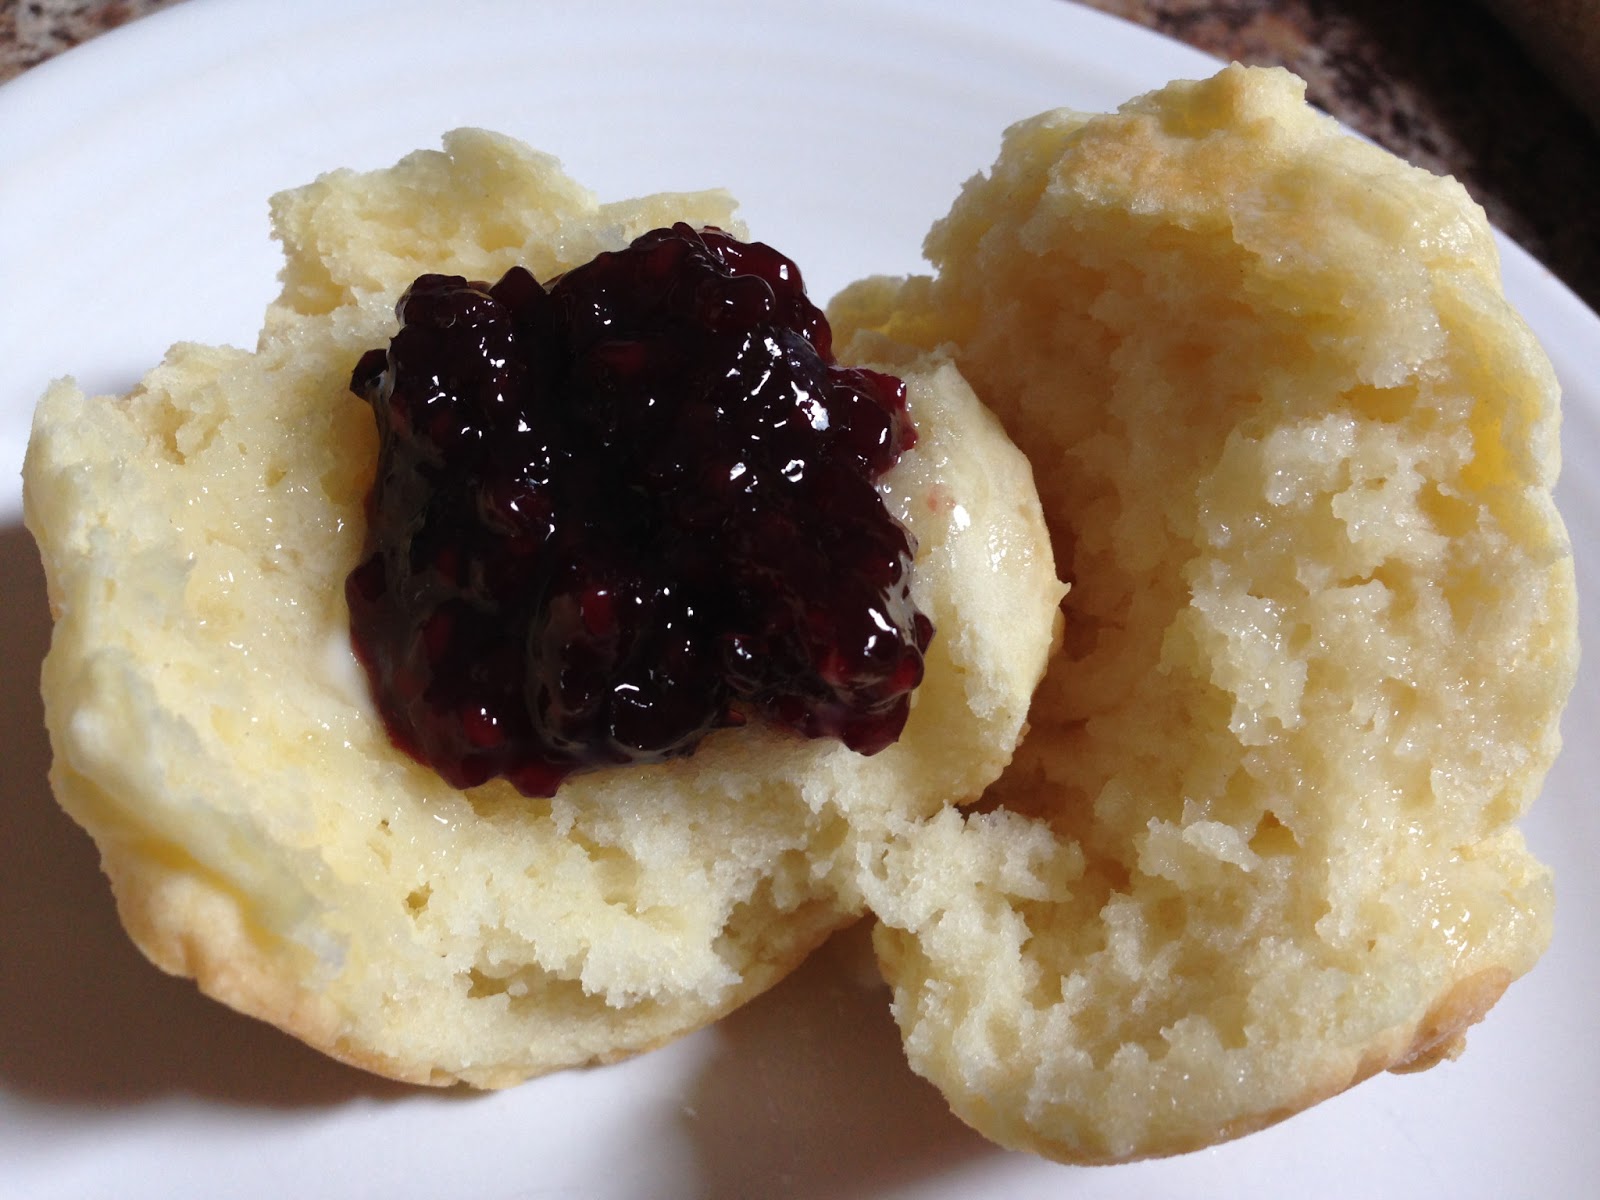
Just check out the texture ...
There are so many ideas and ways to use this mix ... so get creative! But of course, you must first make the biscuit recipe and enjoy a delicious, fluffy, buttery treat - something I thought I would never be able to do again (and yes ... that is homemade Ontario blackberry jam on top - heaven!).
Labels:
Gluten-Free,
Meaty Meals,
On the Side,
Sweet Treats
Thursday, April 18, 2013
Crispy Chicken Wings
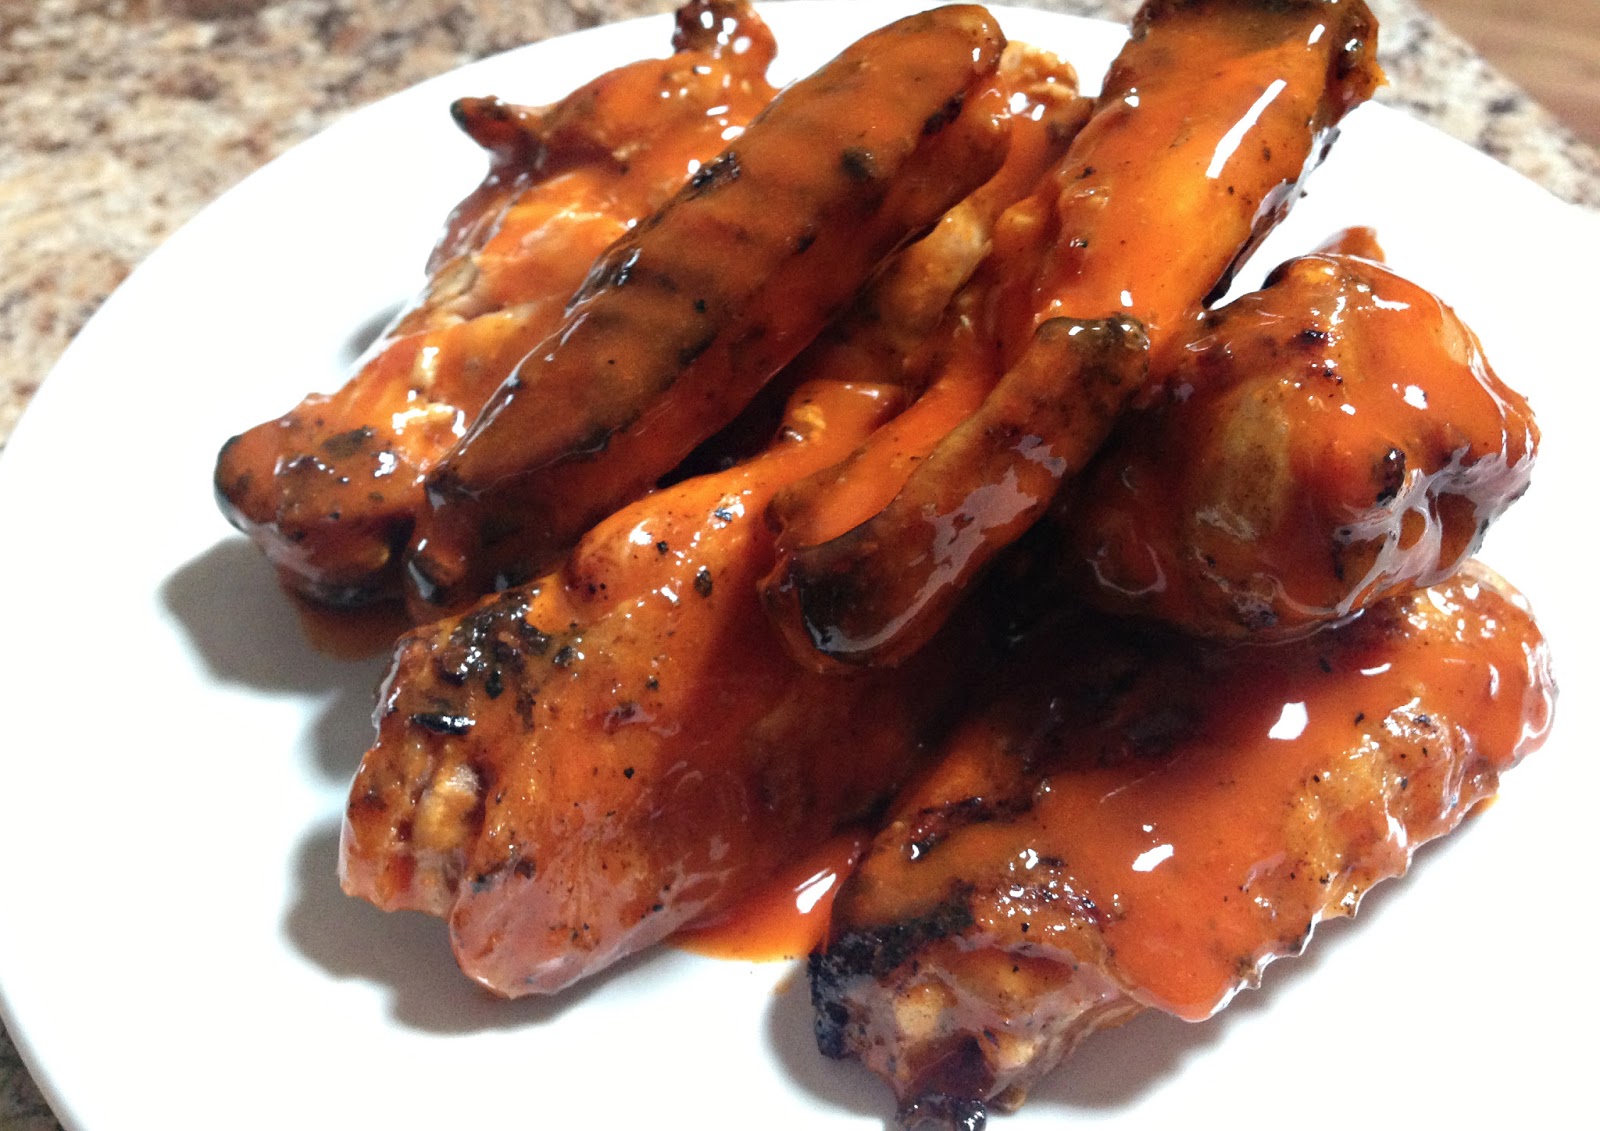
Crispy, tangy, saucy chicken wings are a classic. One problem - they pack a huge calorie punch. Traditionally, wings are deep-fried, rolled in butter, then slathered in sauce ... but you can get just as much flavour by ditching the deep fryer and using your BBQ!
This idea is not my own. Our good friend, Jeff, showed us this trick a couple years ago and we have never looked back. The wings are every bit as crispy, and even though they are still high in calories, by using the BBQ you can slash the calories in half. That's huge!!
INGREDIENTS
chicken wings (any amount)
salt and pepper to taste
oil for the BBQ
Frank's Red Hot Buffalo Wing Sauce (the best ... and gluten-free!)
Salt and pepper chicken wings. Let sit for at least an hour.
Clean BBQ with a scraper. Using a folded paper towel, oil the grates.
Preheat the BBQ then add the chicken wings, skin side down.
DO NOT LEAVE YOUR BBQ! Because the chicken wings are higher in fat, they need turned more often and left unattended could cause a flare up ... so be careful.
BBQ until cooked through. This usually takes about 20-30 minutes ... sometimes longer depending on the size of your wings.
Place hot wings in a large bowl. Cover with sauce and toss to coat.
TIP: If you're making these for a dinner party, you can toss them in sauce and place them in the oven, in a single layer on a parchment covered baking sheet, at 300 degrees. I wouldn't leave them too long or they'll dry out ... maybe 20 minutes at the most.
Wednesday, March 27, 2013
Lean & Green Tortilla Soup
This soup will not win any beauty contests, but it is DELICIOUS ... not to mention a snap to put together. When I was a teenager, my mom started making this verde version of tortilla soup and it was an instant hit. The flavour is SO GOOD and, for Mexican food lovers like us, almost addicting! The best part of all :: it's one of those naturally gluten-free meals that requires no substitutions and makes a wonderfully fresh and hearty dinner. Matt and Morgan are crispy-tortilla-strip crazy, so I always double that portion of the recipe ...
INGREDIENTS
10 corn tortillas
olive oil
sea salt
1 cup chopped poblano peppers
1/2 cup onion, chopped
2 large boneless skinless chicken breasts
1 tsp cumin
1 garlic glove, minced
28 ounces of chicken broth (or one large can)
2 cans black beans, drained and rinsed
1 1/4 cup salsa verde (make sure you grab mild, unless you want it spicy)
2 tablespoons fresh cilantro + more for garnish
Crispy Tortilla Strips (the tasty topping)
Preheat oven to 400 degrees.
Cut six of the tortillas in half. Stack the piles on top of each other and cut into 1/2 inch strips. Toss with 1 tsp of olive oil and bake 10-12 min, stirring once, until crisp. Remove from the oven and lightly sprinkle with sea salt.
Soup
Remove membranes and seeds from the poblanos. Toss chicken in cumin. Slice the remaining four tortillas into strips.
Heat 1 tsp of oil in a medium size soup pot. Add chicken and cook for about 5-10 minutes until it's browned (try not to overlook, as chicken breasts can dry out quickly). Remove and set aside.
In the same pot you used for the chicken, add poblanos, onion and garlic. After about 3 minutes, return chicken to the pot and add the beans, salsa, broth and raw tortilla strips. Bring to a boil, then reduce heat. Simmer uncovered for 15-20 minutes. Right before serving, stir in cilantro.
Top each serving with a small dollop of sour cream, a sprinkle of Monterey Jack and a few of the crispy tortilla strips.
Labels:
Gluten-Free,
Meaty Meals
Friday, February 8, 2013
King Ranch Chicken
It has a bit of a tex-mex flare mixed with a chicken-and-noodles kind of heartiness. As a busy mom, I love it because assembly is quick ... and it's so easy to make ahead of time to pop in the freezer. I also love that making it gluten-free is very easy with just a couple swaps.
INGREDIENTS
1 rotisserie chicken, de-boned and shredded (no skin)
1 regular-sized bag Tostitos, crunched up
1 14.5 oz can diced tomatoes (I love the fire-roasted by Hunts)
1 4 oz can chopped green chilis
1 can cream of chicken soup*
1 can cream of mushroom soup*
1 onion, chopped
olive oil
1/2 tsp sea salt + a pinch
1/2 tsp fresh ground pepper + a pinch
3-4 cups shredded cheddar, or cheddar blend
* To make this recipe gluten-free, substitute one can of Progresso Gluten-free Creamy Mushroom soup mixed well with two gluten-free chicken bouillon cubes for the two cans of "cream of" soup.
Preheat oven to 400 degrees.
Sauté onions, seasoned with a pinch of salt and pepper, in a little olive oil until golden. Set aside.
Mix together soups, tomatoes, green chilis, sautéd onion, salt and pepper.
Add crunched up chips to the bottom of a greased 9x13 baking dish. (Dot is always willing to help out when he sees me crunching up the chips ...)
Pour half the soup mixture over the chips. Top with all the chicken, then half the cheese. Add the remaining soup mixture on top. Cover tightly with foil and bake for 20 minutes.
Out of the oven, remove foil and top with remaining cheese. Bake another 20 minutes, uncovered, until cheese is bubbly and starts to brown.
You can make this a full meal by adding a salad ... or even a few apples, cut up for dessert.
Labels:
Gluten-Free,
Meaty Meals
Wednesday, February 6, 2013
Loaded Chicken Sausages
One of the hardest things about living gluten-free, as you'd expect, is bread. Oh, they sell GF bread ... but the texture is ... different. We aren't huge bread eaters in our house anyway, but we do like our buns :) ... and let me tell you, Udi's gluten-free buns cannot be beat. I tried them with gluten-free mozzarella and roasted garlic chicken sausages I found at Sam's Club for a quick, busy weeknight dinner.
INGREDIENTS
1 tablespoon butter
1 tablespoon olive oil
2 medium onions, sliced
1 large green pepper, sliced
salt and pepper to taste
4-6 sausages of your choice
buns of your choice (of course, Udi's is the BEST for gluten-free)
Preheat oven to 350 degrees.
Wrap desired number of buns tightly in foil and place in the oven to warm while you make the sausages.
On medium heat, melt butter with olive oil. Add onions and peppers as stir to coat. Season with salt and pepper.
As soon as the peppers and onions start to soften, add sausages.
Continue cooking until the onion and peppers are caramelized and the sausages are lightly browned.
Remove buns from the oven and load them up! (These sausages were super cheesy on the inside!!) Serve with a little homemade Kansas City BBQ Sauce and some delicious baked chips. We love these from Sam's Club ...
BONUS!! Leftover sausages make an amazing lunch the next day ...
Simply fill the sausage and wrap tightly in foil and store in the fridge until lunchtime.
Preheat oven or toaster oven to 350 degrees and place the wrapped sausage in to cook. 20 minutes later ... a warm treat better than any fast food! Serve with some fresh fruit and call it lunch!
Labels:
Gluten-Free,
Meaty Meals
Subscribe to:
Posts (Atom)